Wednesday, September 7, 2011

Fall is Coming!

My favorite season is fall! Even though I live in the desert and it is relatively short here. I think that the decor for autumn and halloween are probably my favorite part of it all. These are some of the amazing ideas that I may be trying for some new decor this year.


 All of these photos can be found on my Pinterest Halloween board.  I would love to see what everyone else has found! It is always fun to change it up a bit year to year.  Looking at all of these pictures has made me want to o get my stuff out and start decorating!  I must resist the urge...it is only the beginning of September!  What is your favorite season and/or holiday?  What do you get excited for?

Thursday, September 1, 2011

Colorful Stenciled Plates

Good morning all!  I hope you enjoyed my guest blogger Stephanie from Spray Paint and Spit Up.  She seriously is one of the greatest people that I have ever had the privilege of knowing!  Thank you Stephanie for sharing your super creative idea!

I love colorful dishes. With my obsession with Vintage Pyrex, that is really starting to happen in my kitchen. A while ago, I had purchased these beauties at Anthropologie.
I love them! I love that they are all different colors and they add such character to any kitchen.  Some of the plates that I have are just clear glass. no character at all.  I decided to bust out my Martha Stewart Paints and put matching stencils o the bottoms of them. (Since they are dishwasher safe and all!) 
Here are a couple of the colors that I used, Mint and Jonquil, along with Habanero and Sea Lavender.  I used this stencil, from the Arabesque set.
And this is what I got.
I think it adds just the right pop of color to a plain old dish and super easy to do! Hope you all have a fabulous day!

Wednesday, August 31, 2011

Guest Post by Stephanie at Spray Paint and Spit Up

I am so so so excited to have one of my great friends Stephanie guest post today! I know you all will LOVE her just like i do! Enjoy!!

Hi everyone!!  My name is Stephanie I have a little budding blog over at Spray Paint & Spit Up.  I like to describe myself as a new mommy & old wife with a mean creative streak.  I do all sorts of things, but my main loves are photography, baking, and design.  So how exciting is this?!  I get to guest blog on Kristina's lovely blog!  I can assure you I am probably way more excited than you!  But have no fear, soon you will get so see more of Kristina's lovely projects, but today, we are talkin' cupcakes, so let's dive on in!!

A good friend of mine is currently pregnant with her second child {you can see her impromptu family photo shoot here} and wanted to reveal the gender of her bun in the oven in a fun way to her parents.  So she settled on cupcakes that had *spoiler alert* pink in the middle and, knowing my love for baking, she asked me to help her.  

So after a "test batch" {or two - yumm!} we got the technique just right.  So if you've ever wanted to do a gender revealing cupcake, look no further than this tutorial!!

To start you'll need two of your favorite cupcake recipes.  For the main body of the cupcake, it'd be a good idea to use either a yellow or white cupcake {we used french vanilla}.  Then for the center of the cupcake, we used a strawberry cake mix - yes, you read that right...these are not from scratch, but hey, I've got a 3 month old and she has a 15 month old PLUS one on they way...we were okay with a box! But I will say in my defense, boxes rarely, if ever, enter my house...anywhoooo....

Mix up the yellow batter and your colored batter separately.  You'll line your cupcake pan with paper liners, then scoop a small amount of the yellow mix into the bottom of each cup.  Then, take a small spoon {I actually used a baby spoon} and put a dollop of your colored batter in the center of the cup.  It will look something like this: 


Be careful to only get the colored batter in the center or else the color will show through on the sides of the cupcake and that would kind of ruin the point, yes?  So, once that's done go back to your yellow batter and fill the rest of the cup with it, so that it completely covers the colored batter {like so}:


Pop those babies in the oven and when they come out, they should look a little something like this: 


Now, if you don't use enough batter on top some of the color will show through {like they did on some of mine} so just take care to cover them well, without over-filling the cups, or else you'll get flat cupcakes instead of happy round topped ones!

Okay, on to the fun part!!  We used just a basic cream cheese frosting dyed in pink and blue to ice our cupcakes.  I *LOVE* frosting...I say the more the better!  So I generously frosted the cakes and added pink sprinkles on the blue and blue sprinkles on the pink.  They came out pretty darn cute if you ask me!!! 


Next, I worked on packaging.  She was sending four each to her parents and her husband's parents, so I stopped by Michael's and picked up cupcake boxes from Wilton.  They worked out really well to keep our cute little cupcakes safe from jostling...don't ask me how they will stay in place if the post office decides to turn the box upside-down, but I don't want to think about that. 


We made cute little distressed tags that say "Eat Me" and I wrapped the boxes in cheesecloth.  I think they turned out so great!


What's that you say??  You want to see the inside of the cake??  Okay, well, I suppose I could take one for the team and take a bite so you can see the inside.


IT'S A GIRL!!!!  
Maybe one more bite for a little better view...


Ummm...I seem to have misplaced the cupcake...


So that's my version of the "What's It Gunna Be??" Cupcake!  I hope you've enjoyed my little guest spot and maybe one day you'll find yourself over at Spray Paint & Spit Up! Thanks for reading and happy baking!!

PS - For any of those concerned about my missing cupcake, I later found it on my hips, thighs, and butt...


Sunday, August 28, 2011

The New Martha Stewart Paint Line

I'm sure you've all heard about the AMAZING new products that have come out for Martha Stewart Crafts. Miss Martha has outdone herself again! She is my hero! You can see all of the new products here.  It is all pretty amazing!  The tool that I cannot wait o get my hands on is the spray paint converter!  It lets you turn any of her paints into spray paint!  Anyway, I was so excited to be able to get one of the stencils, paint and foam roller to update a project that I did earlier.  


I finally feel like this project is finished.  It always seemed like it needed something else.  The color that I used for the stencil is Lake Fog and the stencil set is called Arabesque.  All available at Michaels.   Have you used this new line at all?  What have you done? I would love to see it!

Friday, August 26, 2011

Crazy for Chevron

Ok, ok, I know this may be a little redundant, but i love Pinterest!  The ideas and inspiration on there are just amazing!  I have been loving chevron print items for quite some time now, but the things that I have seen on there lately have thrown me into a whole new crazy! 
 this nursery is just to die for! the bedding is so original!

 I don't think I ever would have thought of using a chevron print on furniture, but this is amazing!

 I know we've all seen this a million times, but I am in love with it!

And this chair...my goodness cuteness! 

And by the way...if you haven't had enough chevron...Target comes out with a new line on September 13th!


And there is oh so much more than this!!! Until next time...i'll be drooling over this stuff!

Thursday, August 25, 2011

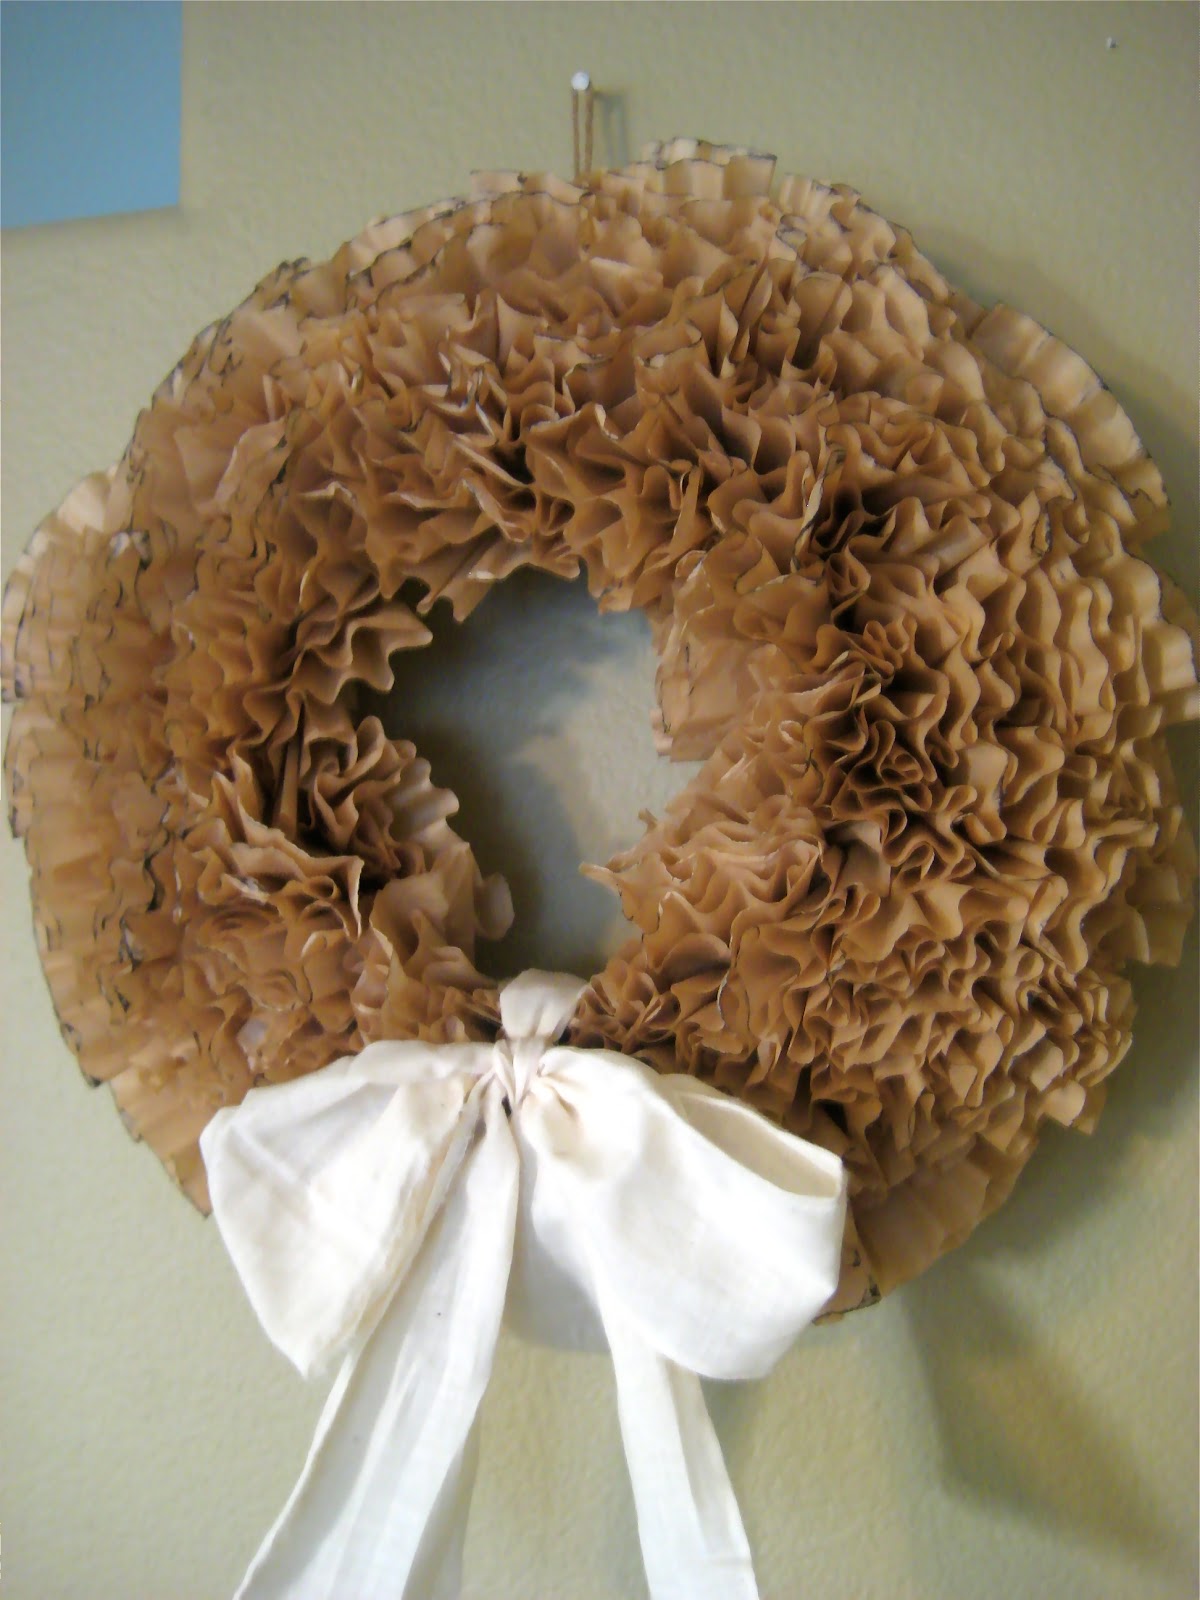
DIY Coffee Filter Wreath

I love wreaths! I love how they can make a home feel so cozy and comfortable.  I decided to make a small wreath with some supplies that I had on hand.  I love the way it turned out. 


Here is what you need:
foam wreath any size (mine was 9" bought at the dollar store)
brown coffee filters (you can find them at the 99 cent store)
straight pins
Tim Holtz Distress Ink in Walnut Stain
scrap piece of muslin for the bow

This project is really so simple, I feel silly doing a DIY for it, but here it goes...
Start with one coffee filter and pinch the bottom middle to make a flower like shape. Start on the inside of the wreath and pin the coffee filter to the wreath.  Make your way around the inside of the wreath then start a new row on top of that row.  I hope that makes sense.
As you complete each row, you start a new one until it is nice and full.  Once you are finished pinning the coffee filters, take your distress ink and dab it along the tips of the coffee filters for a vintage look.  You can then tie your muslin scrap or ribbon on the bottom and hang that beauty! I can't wait to change the ribbon on the bottom for the holidays!

 
Cost breakdown:
foam wreath: $1
coffee filters: .99
straight pins: on hand
muslin scrap: on hand
distress ink: on hand 
Total cost: $1.99


Can't beat that!  Do you have any great wreath tutorials? I would love to try them!


Tuesday, August 23, 2011

I'm Home...Again.

Oh my goodness, it has been a week. In my earlier post, I said that I was in Vegas for a tax conference and came home on Thursday evening. That night we got a call that my husbands grandmother had some complications from a blood clot and was in the hospital, not doing well. Later that evening, we received the news that she had passed away. Friday morning we then took off to Northern California to be with some of his family. We made it home Monday night and I had every intention of starting some new blog worthy projects, but have A LOT of sewing to get done. I really really promise I will get some blogging done here soon! Thank you all again for being such devoted readers! I love you all!!